Next up: slicing the mid cones and adding a plug to the pole piece. Gotta admit, I'm pretty nervous about doing it. I have no spare drivers and they are, of course, NLA. If I mess one up this project has been a complete waste of time...
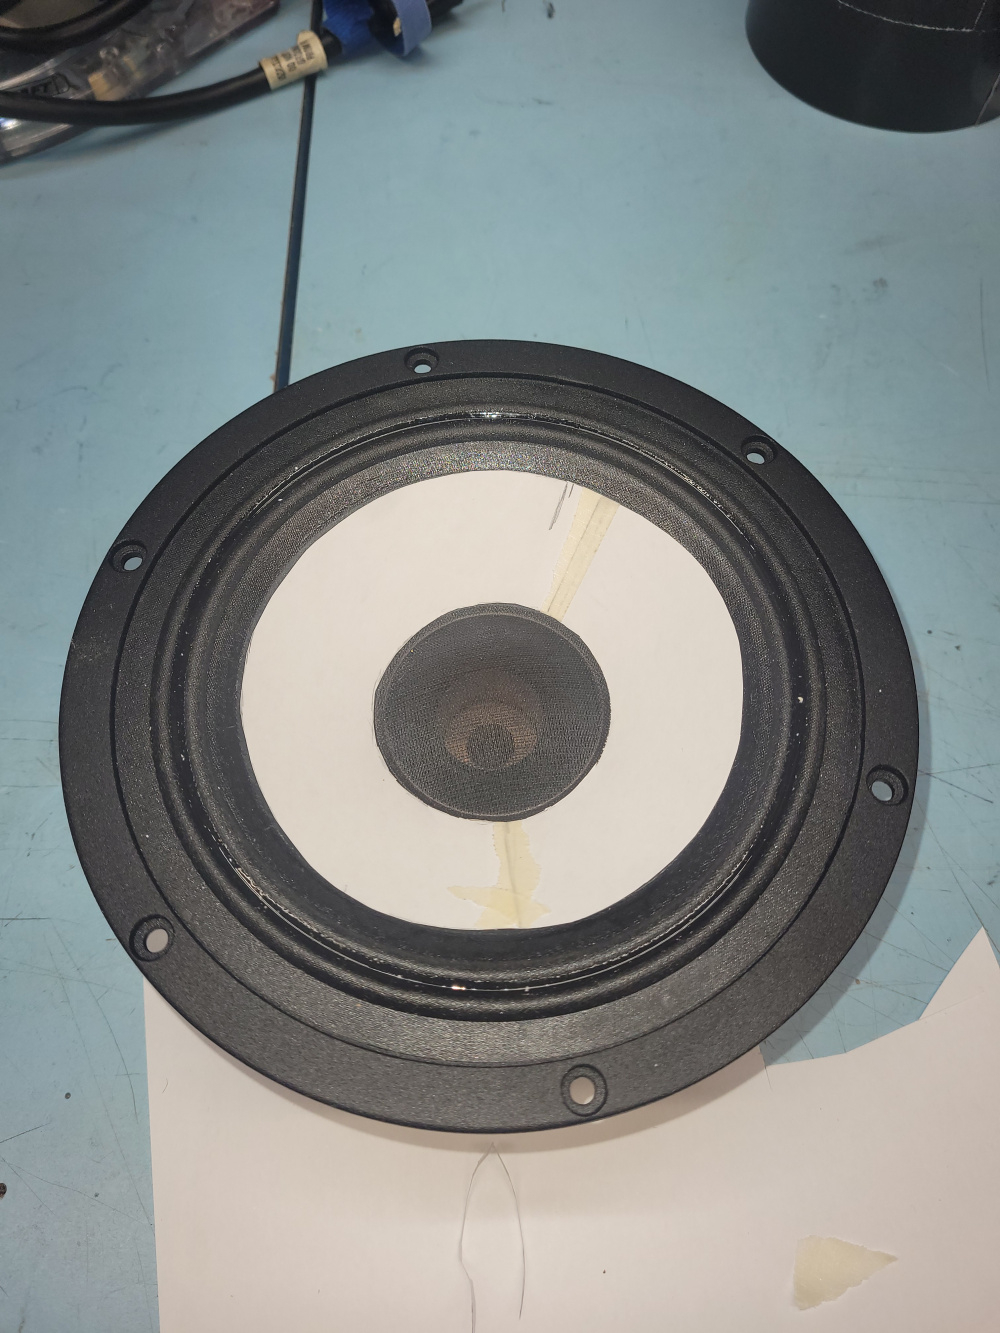
Being an Engineer I suffer badly from not being comfortable just free handing stuff So being nerdy I spent some time trial and error cutting some computer paper to create this template that matches the profile of PM180's cone. Now I can untape one end then lay out the cut lines with dial caliper and a straight edge.
Comments
Yeah, I like!
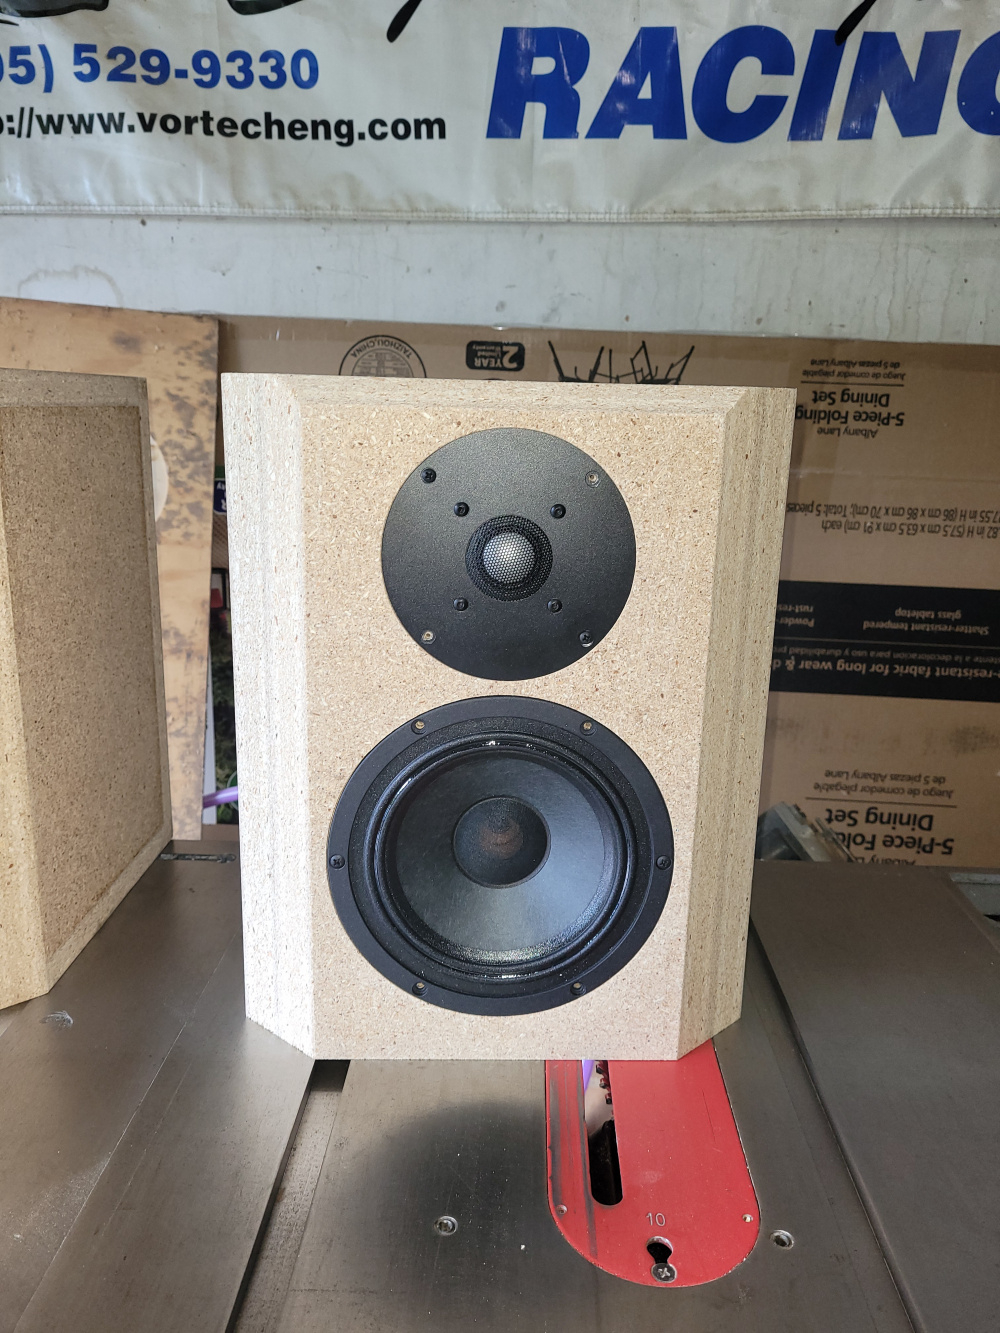
Next up: slicing the mid cones and adding a plug to the pole piece. Gotta admit, I'm pretty nervous about doing it. I have no spare drivers and they are, of course, NLA. If I mess one up this project has been a complete waste of time...
I like that you angled the top edge too.
... need a little help with that cone?

Being an Engineer I suffer badly from not being comfortable just free handing stuff So being nerdy I spent some time trial and error cutting some computer paper to create this template that matches the profile of PM180's cone. Now I can untape one end then lay out the cut lines with dial caliper and a straight edge.
Try a tape arrangement like the one on EVH's guitar - lack of symmetry might actually be good?
If not, at least it looks cool . . .
So I made these paper templates:
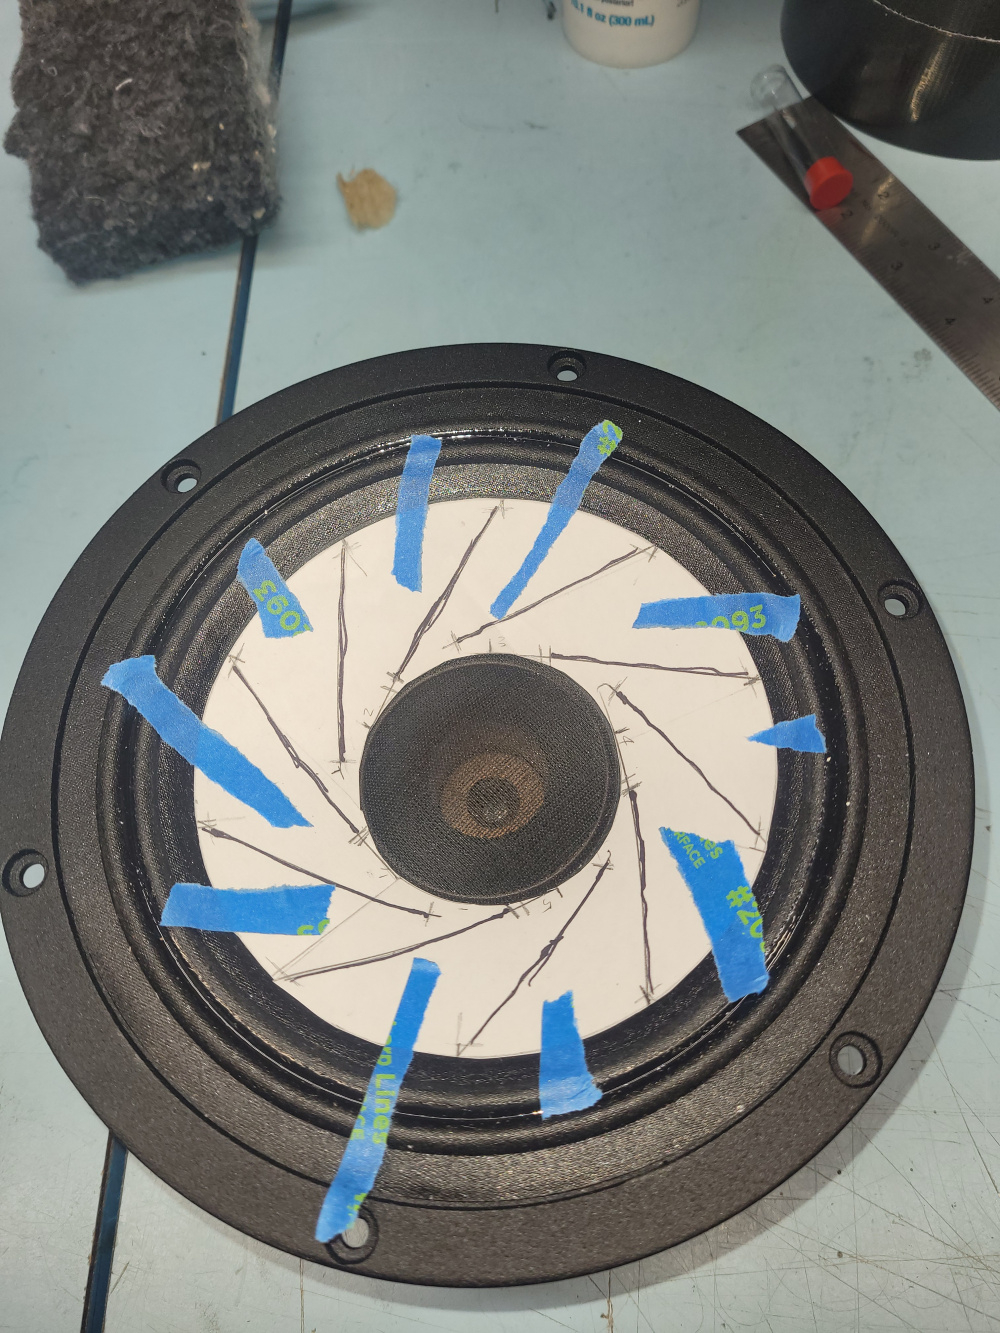
And performed the horrific slicing with a #11 X-Acto blade: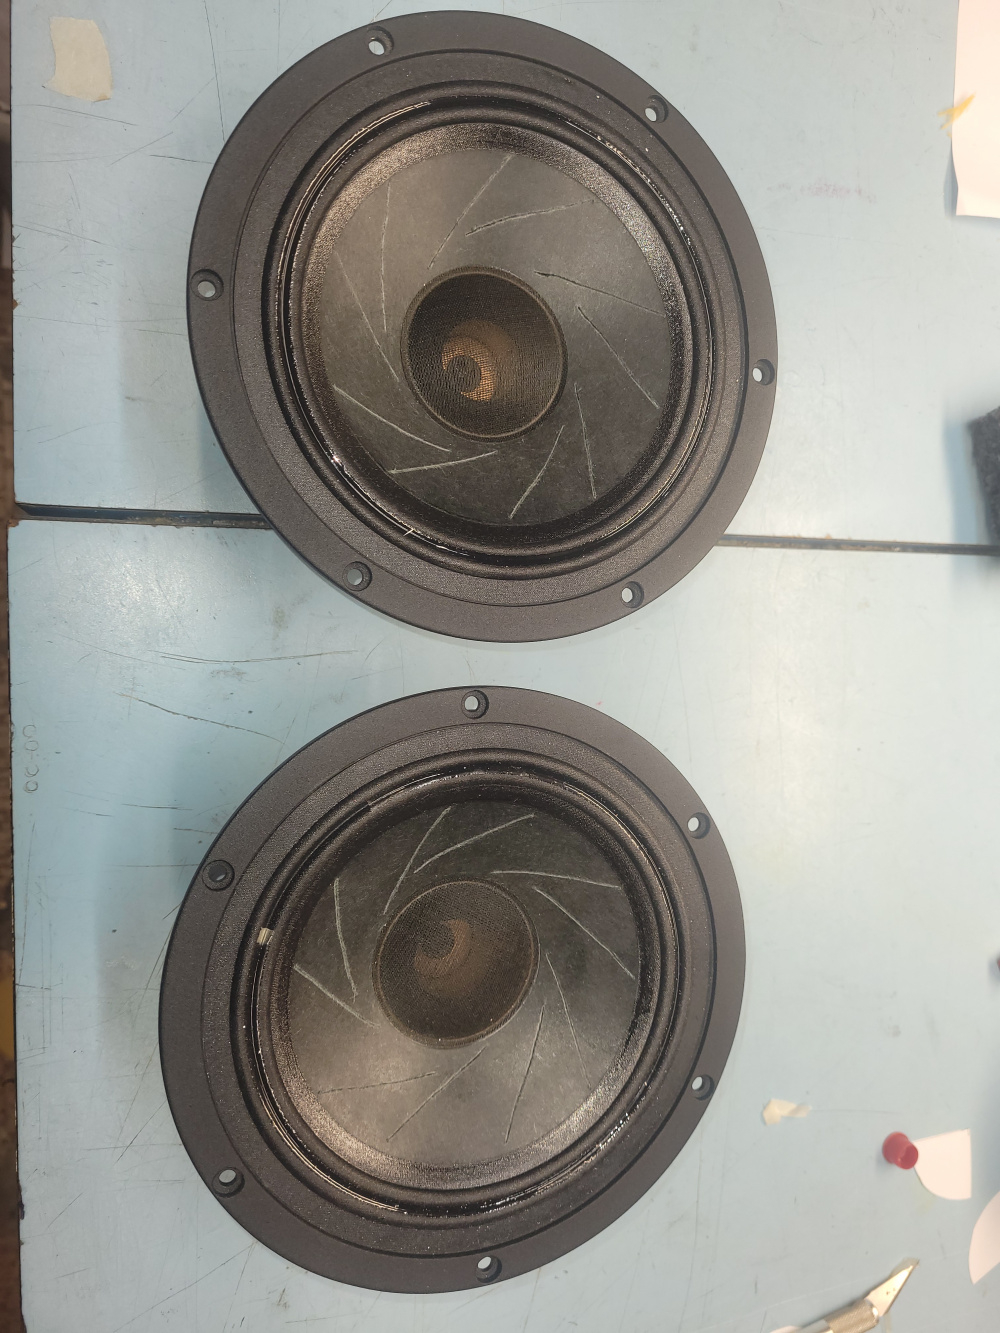
Even with the template I can't cut a straight line to save my life LOL! Hopefully the application of sealant goes much better!
Having done a practice cone, apply sealant from the rear as only a little has to seal from the front. I used Permatex Black Silicone Sealant
InDIYana Event Website
Hope you all have fun in Springboro this weekend!
@PWRRYD - courageous!
Did you take measurements before the operation?
Just impedance sweeps to make sure both were in working order.