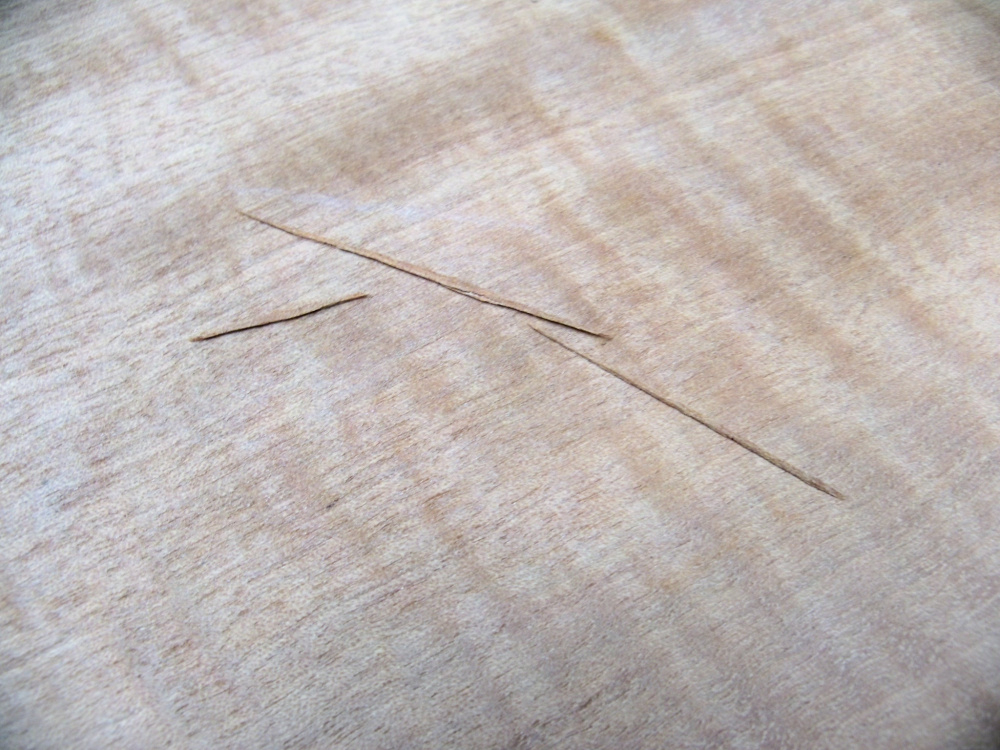
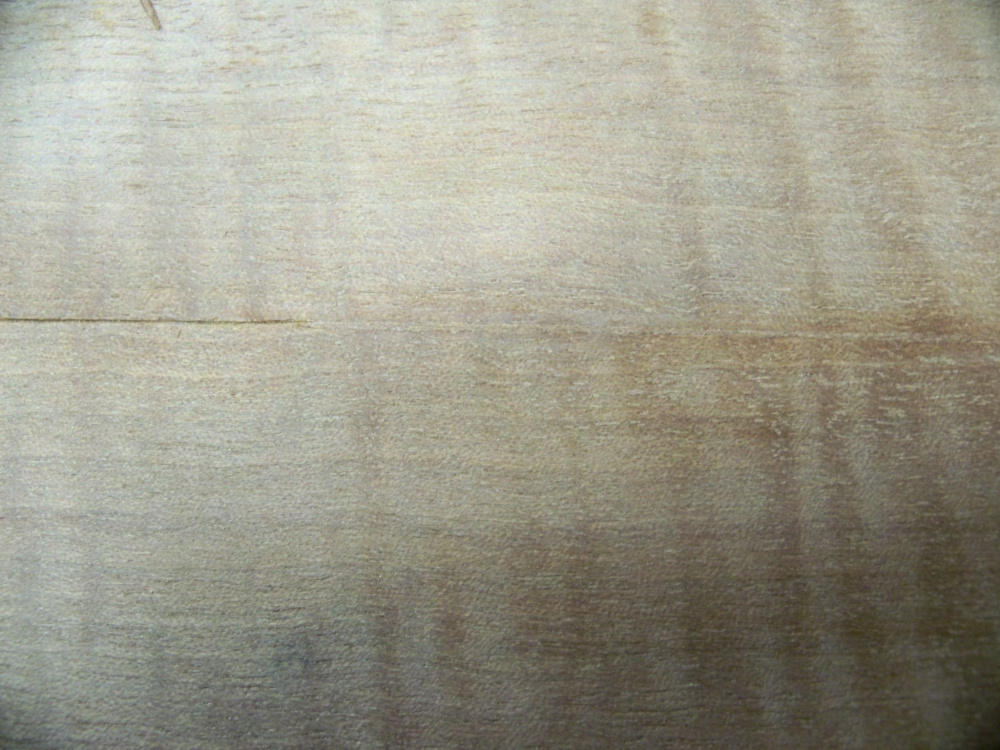
As I have said in the past, I'm not a great woodworker, but I am pretty good at fixing my mistakes, so I thought that I would show you guy's my latest flub and how I sort of concealed it. It's still not perfect, but a hell of a lot less noticeable. I completely screwed the seam on the top of the sub cabinet, no excuses, complete operator error, I just blew it.
I used fine strips of veneer and carefully fitted and glued them in the seam, and using a card scraper and sander brought the patch flush with the surface. It took several days, doing a small section at a time.
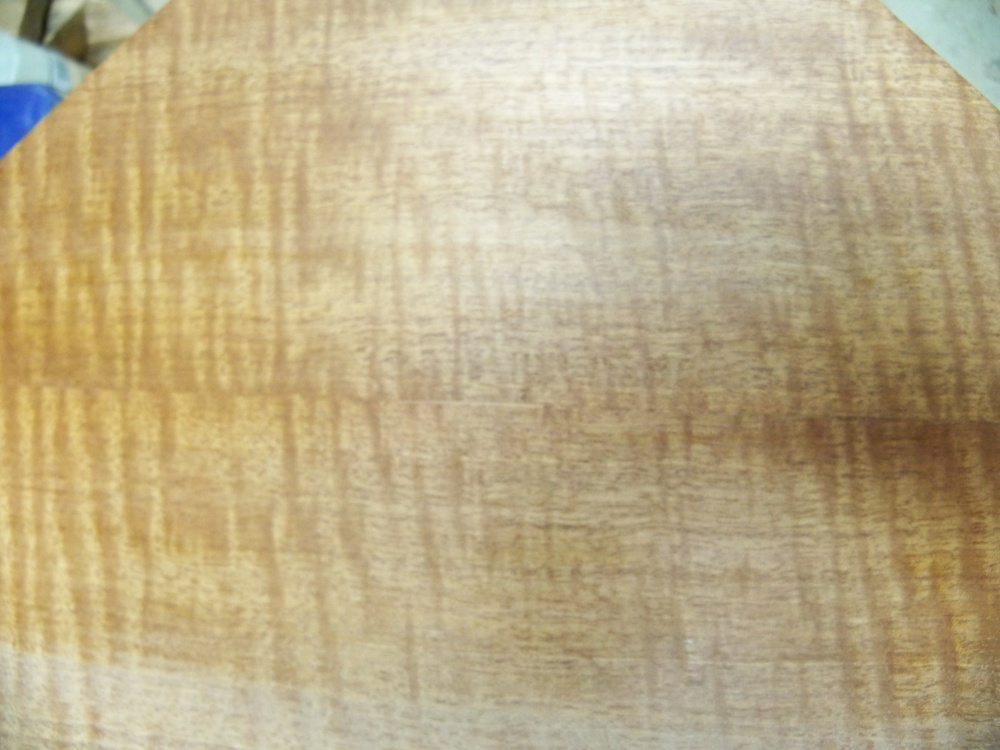
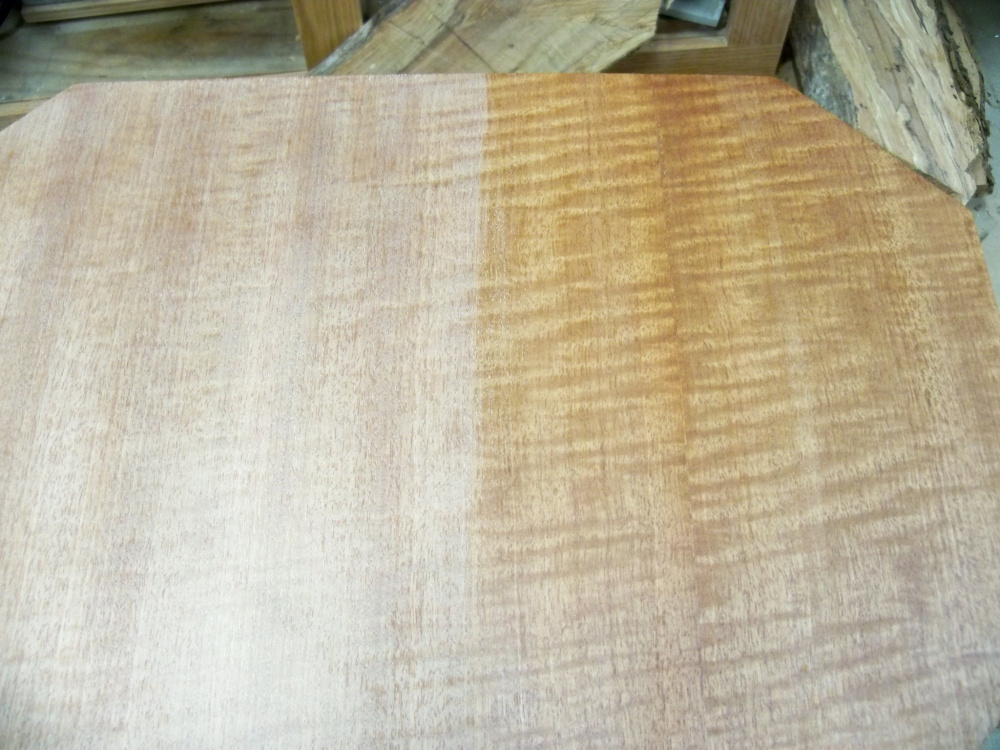
Here's the final result with a bit of shellac so that it shows the mismatch a bit better. It's not perfect, but definitely improved.
This brings back fond memories of my veneering failure. One think I learned is when filling any small voids with glue (or epoxy) and sawdust, that sawdust of the same species will become dark, so use as light of wood species for the dust mix as you can.
I forgot to mention, when filling in with the small strips, you want the ends that join to be tapered and not squared off, because that square edge will be noticeable
@dcibel said:
This brings back fond memories of my veneering failure. One think I learned is when filling any small voids with glue (or epoxy) and sawdust, that sawdust of the same species will become dark, so use as light of wood species for the dust mix as you can.
I have filled fine imperfections with sawdust and then wet it with shellac. It usually comes out light this way.
I have a bad w4-656 mid woofer. Something got into the gap and now rubbing, so I had to find a driver with the same diameter basket. The only viable option was the Dayton RS125P, so that's now what I'm using. Of course the crossover is different, and I'm trying to get it finished before Indy.
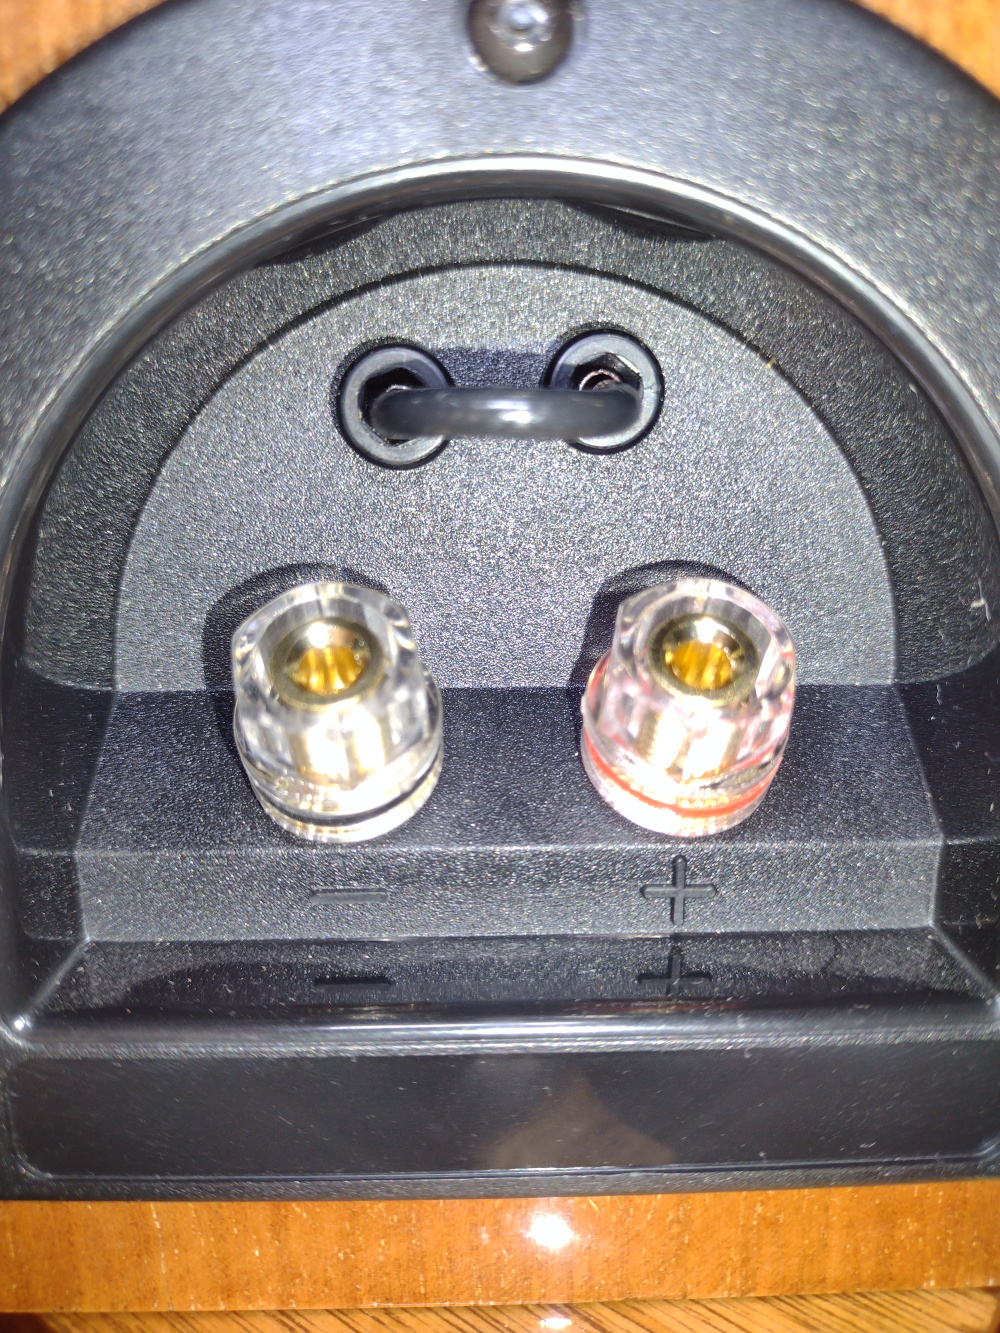
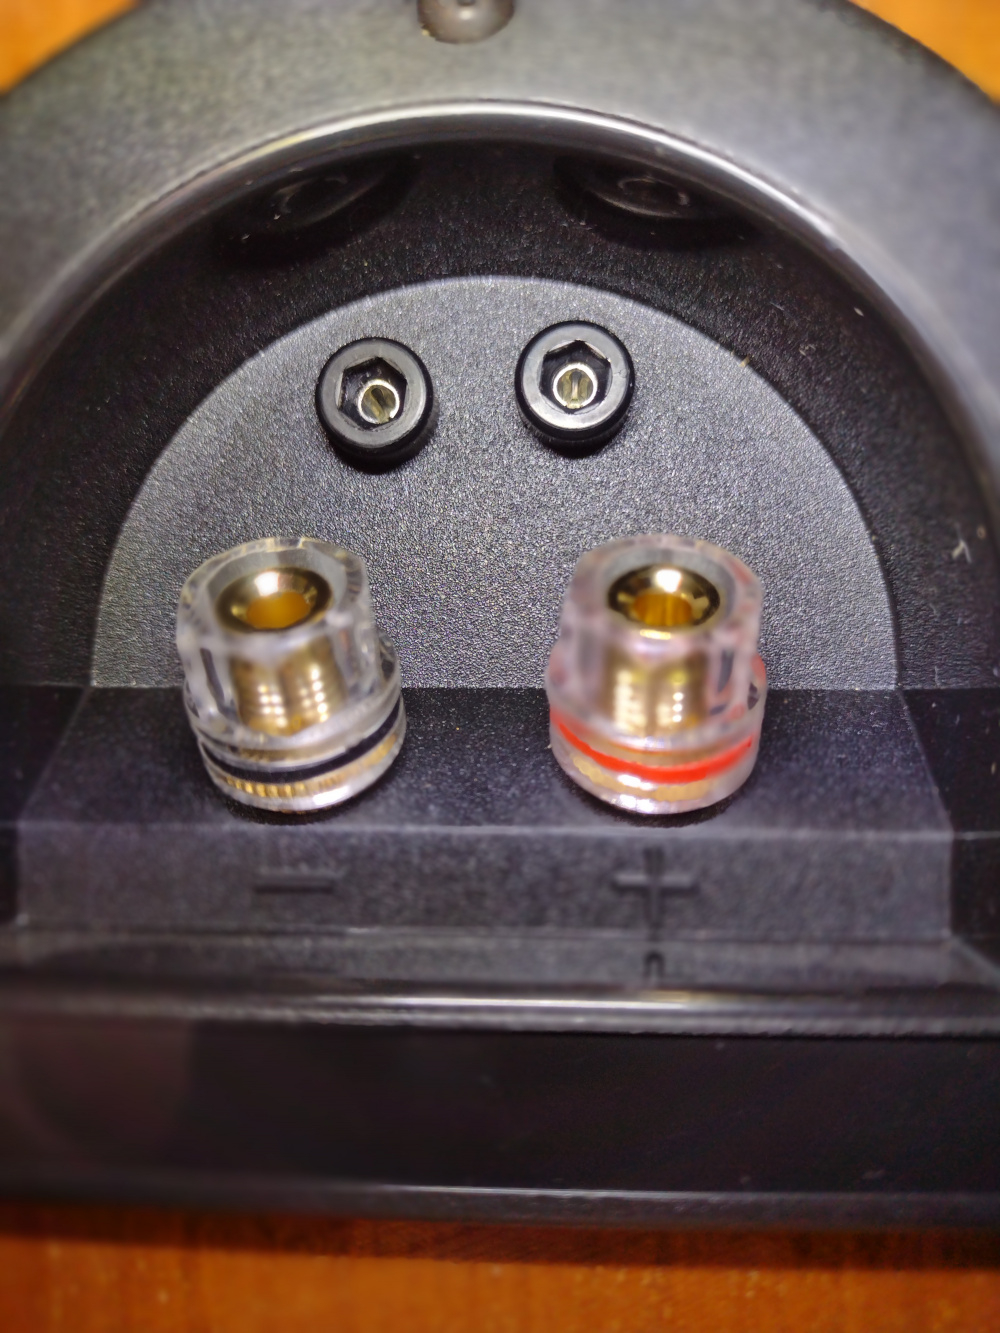
I was playing with tweeter levels and came up with this in order to short out a resistor. It's a pair of 2mm banana jacks meant for meter probes and I found that a #12 solid wire fits nicely as a jumper.
I actually prefer the Dayton to the TB, it sounds a bit cleaner to me and a little more dynamic. I had never used the RS125p before, but I can say I like this little driver quite a bit.
Comments
The residue is actually 2k primer that I just brushed on and still need to sand.
As I have said in the past, I'm not a great woodworker, but I am pretty good at fixing my mistakes, so I thought that I would show you guy's my latest flub and how I sort of concealed it. It's still not perfect, but a hell of a lot less noticeable. I completely screwed the seam on the top of the sub cabinet, no excuses, complete operator error, I just blew it.

I used fine strips of veneer and carefully fitted and glued them in the seam, and using a card scraper and sander brought the patch flush with the surface. It took several days, doing a small section at a time.
Here's the final result with a bit of shellac so that it shows the mismatch a bit better. It's not perfect, but definitely improved.
Nice fix. Looks really good. I have a couple areas just like this on my Retro Speako's, so I'll have to this a try. Thanks for sharing.
This brings back fond memories of my veneering failure. One think I learned is when filling any small voids with glue (or epoxy) and sawdust, that sawdust of the same species will become dark, so use as light of wood species for the dust mix as you can.
Great work Nick!
Looks great! Nobody would be the wiser unless you told them.
I forgot to mention, when filling in with the small strips, you want the ends that join to be tapered and not squared off, because that square edge will be noticeable
Bravo ol chap, good save!
Now I see what you did there. Nicely done!
InDIYana Event Website
I have filled fine imperfections with sawdust and then wet it with shellac. It usually comes out light this way.
I finally got some clear on this sub.
I have a bad w4-656 mid woofer. Something got into the gap and now rubbing, so I had to find a driver with the same diameter basket. The only viable option was the Dayton RS125P, so that's now what I'm using. Of course the crossover is different, and I'm trying to get it finished before Indy.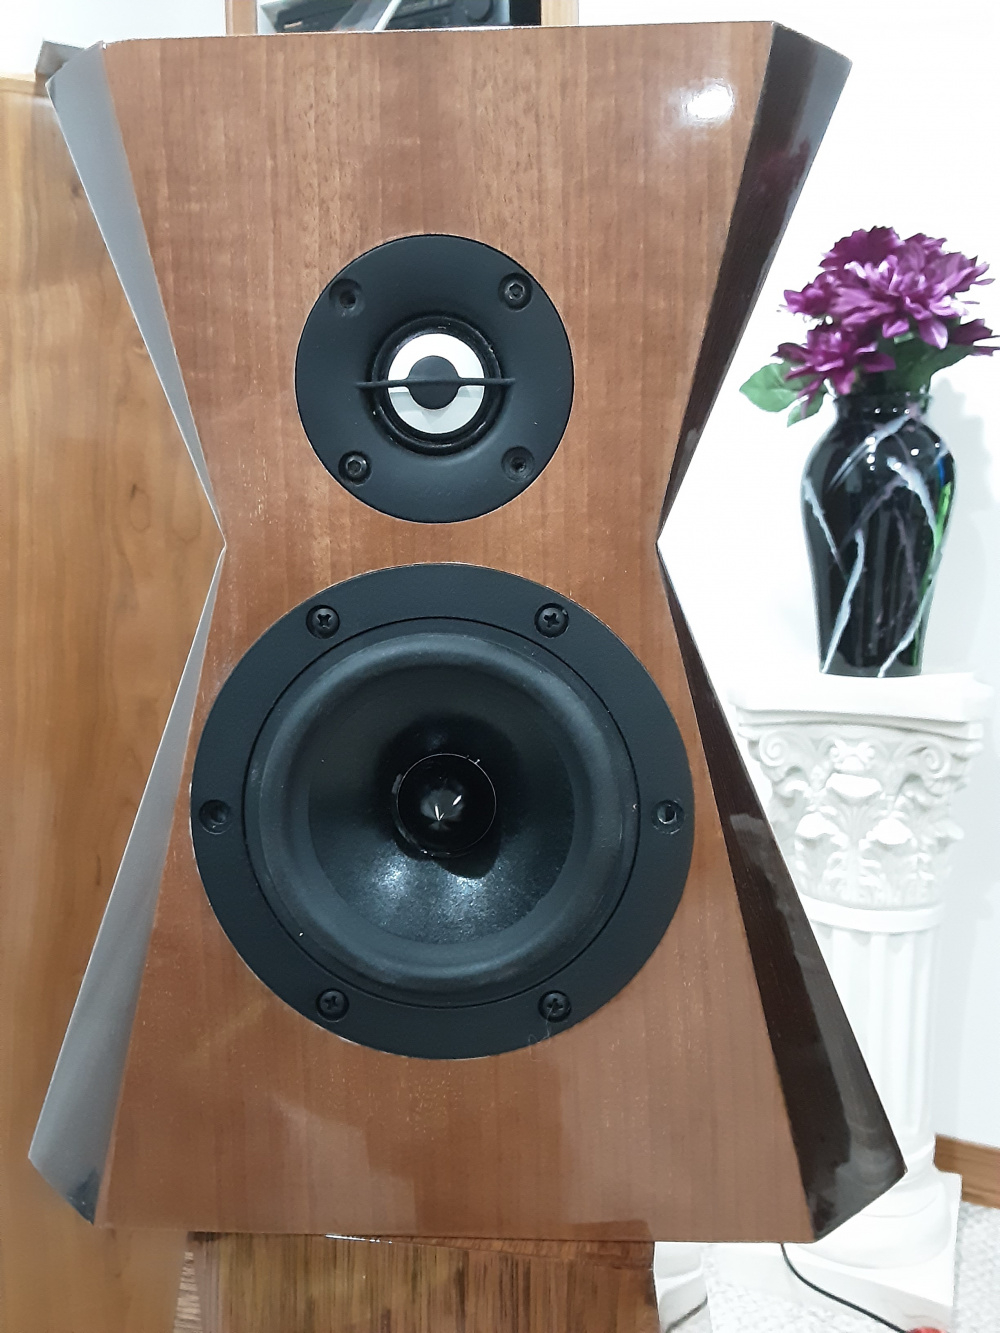
Nothing like throwing a last minute wrench in the plans.
I was playing with tweeter levels and came up with this in order to short out a resistor. It's a pair of 2mm banana jacks meant for meter probes and I found that a #12 solid wire fits nicely as a jumper.
Here's all the near's and far's combined.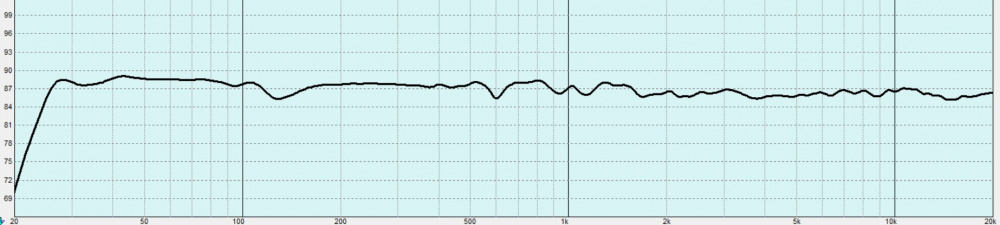
Picture perfect 👍
Excellent work! ... and good save on the midbass swap. What's your take on the sound quality between the two?
I actually prefer the Dayton to the TB, it sounds a bit cleaner to me and a little more dynamic. I had never used the RS125p before, but I can say I like this little driver quite a bit.
I'm looking forward to hearing those ceramic tweeters in less than 2 weeks. They might just be what I'm looking for (upcoming project).
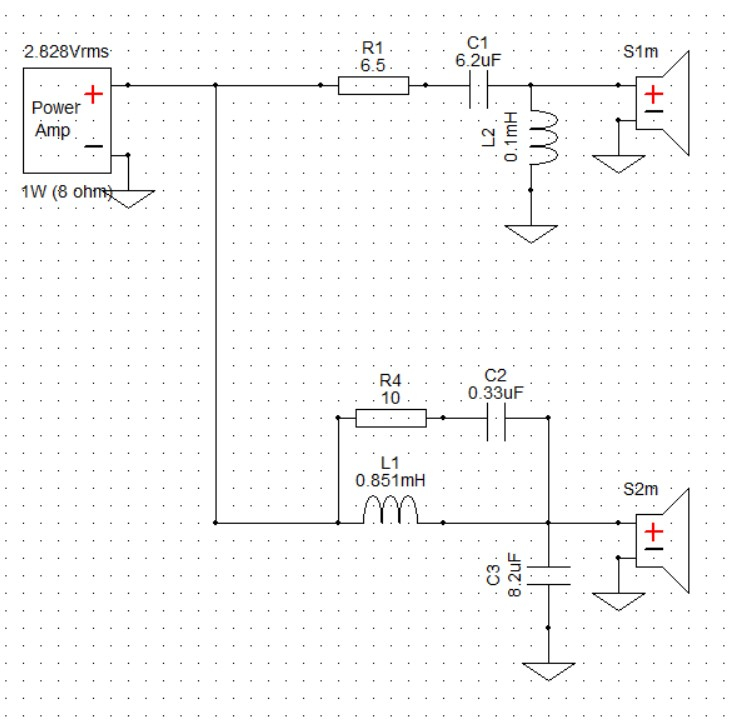
This is the final crossover, it's less complex than the one for the TB mid bass.
Elegant, love it!
That is impressive results for the low amount and value of components.
Sometimes you just get lucky.
Some people like Nick have enough skill that luck seems to find them on a regular basis.
I'm just glad that there are so many here sharing their knowledge. Maybe one of these days I'll be skilled enough to have some luck. 😀